
I haven't quite gotten past that toddler trait of being more excited about the box and wrapping paper than what's inside. I would have little interest in cooking or baking if it wasn't a visual experience. Since I bake for gifts and now occasionally upon request for events, I can't just hand the goods over in something semi-disposable and plastic (Gasp—The BPAs!).
While looking for materials that would keep my hard work in tact and visually appealing I found that 1) Bakery boxes and related accoutrement were expensive and 2) generally would have to be mail-ordered for a carless urbanite. To avoid the expense and inconvenience of getting packages (urbanites know they won't be left on the steps of your rowhome, and with good reason!), I googled around to create boxes with materials I had on hand.
Card stock or old file folders cut into squares work well. For a softer box you can use paper, but you will want to reinforce the bottom. I found these instructions particularly clear, detailed and simple:
And then, I of course, had to find a way to make these boxes my own:
REINFORCING THE BOTTOM OR TOP OF BOX:
1. Trace the bottom of your origami box on a piece of cardboard (pictured below is my roommate's cake mix box saved from the recycling bin— the gluten-filled cake mix had been sealed in plastic inside the cardboard).
2. Cut inside the traced lines and place cardboard square in bottom of box, trimming as necessary.
3. Cut a piece of decorative paper, a picture or simply a piece of paper with a font or graphic to the same size as the cardboard reinforcement and cover or tape in place (You want to be careful using glue, not only could it be generally toxic, many glues have gluten in them and you don't want to contaminate yourself or a friend).
Trace.

Fit reinforcing cardboard.
(Boxes to left made from legal sized folders cut to squares)
Decorate inside and outside.

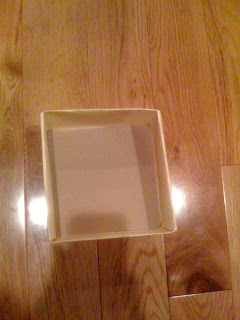
(Box above made from linen paper— I probably won't use paper again for a box this size-- as you can see it bends and is flimsy)
TO DECORATE:
1. Trace decorative paper to fit the top of box.
2. Print out fonts or graphics and tape or paste to top of box.
3. Your imagination is the limit— Funny pictures, inside jokes, sarcastic/ironic quotes of 2009 or any time, literary favorites or anything else that you can dream up will make the box almost as much fun as what's inside.
While the box can be a gift and it's own miniature work of art, don't forget to fill it!


Up Next: A gluten-free, grain-free Yule Log hopefully with my new camera (all previous pictures have been with my iPhone camera while I have spent over a year researching the perfect DSLR . . . )


